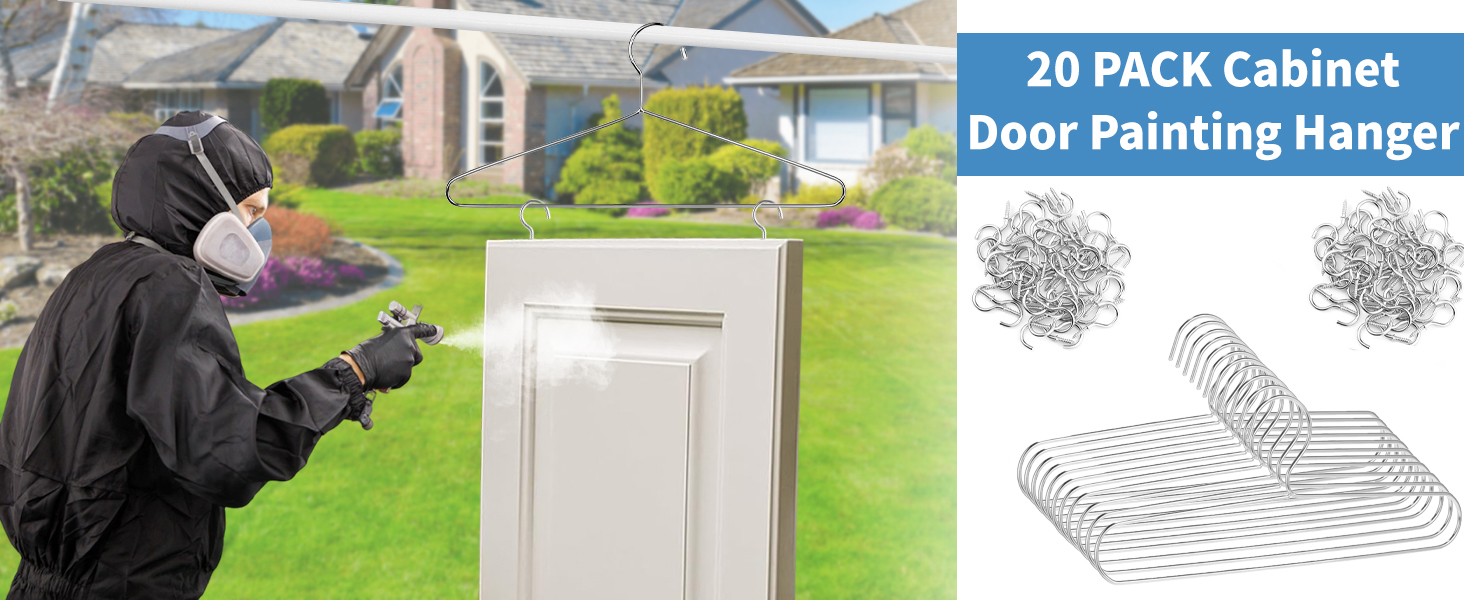
Cabinet Door Painting Hanger: A Smarter Way to Dry Cabinet Doors
Painting cabinet doors is one of those jobs that looks simple until wet panels are leaning everywhere. A reliable cabinet door painting hanger keeps each door suspended, separated, and easy to rotate. With the right support system, you can move from prep to topcoat without fingerprints, smudges, or frustrating touch-ups.
Why Cabinet Doors Need Dedicated Drying Support
Cabinet doors are large, flat, and awkward. They have edges, recessed panels, and fresh paint that must cure evenly. If you lay them flat, dust settles. If you lean them, they slide. A dedicated hanger solves this by holding doors at a comfortable working height. It also lets air reach both faces, which helps solvents flash off and reduces the chance of a gummy finish.
Balance matters: A door that swings or tilts can create drips and uneven coverage. A good hanger locks the panel in place while still allowing you to rotate it.
Access matters: You should be able to spray or brush edges, backs, and recessed details without touching wet surfaces. This is where adjustable arms and rotating hooks make a real difference.
Space matters: Hanging doors vertically uses height instead of floor area. In a small garage or shop, that saved square footage can be the difference between a calm workflow and a chaotic one.
The Hidden Cost of Improvised Drying
Many DIY painters start with sawhorses, buckets, or nails in the ceiling. These shortcuts often cost more in rework than a proper rack. A sturdy paint drying rack gives you predictable spacing and a stable base. It prevents doors from touching each other, which is critical when you are coating multiple panels. It also makes it easier to move the entire batch if weather changes or you need to reclaim floor space.
“The best finish is not just about the paint; it is about how the door rests while it dries.”
Core Features to Look For
- Adjustable arms that fit standard and custom cabinet doors.
- Non-marring hooks or brackets that grip without scratching fresh paint.
- Rotating or tilting action for spraying edges and backs.
- Drip trays or removable catch pans to protect floors.
- Locking casters for mobility and stability.
Painting brackets are the small heroes of this setup. They hold each door securely while allowing you to reach every surface. Look for brackets that are powder-coated or stainless steel, because paint solvents and waterborne finishes can corrode cheap metal over time.
How to Choose the Right Cabinet Door Painting Hanger
Start with door size and weight. Raised-panel doors, solid wood doors, and MDF doors can vary dramatically. Check the load rating of the hanger and the spacing between arms. If you plan to paint many doors at once, choose a rack with enough capacity to keep them from touching.
Next, consider your finish. Oil-based paints, lacquers, and conversion varnishes require solvent-resistant hardware. Waterborne acrylics are gentler, but they still need rust protection. A powder-coated frame is usually a smart choice for both.
Match the Hanger to Your Workflow
A production cabinet shop may need a heavy-duty, multi-door system that can roll between booths. A homeowner refinishing one kitchen might prefer a compact, foldable unit that stores against a wall. The right choice depends on batch size, available space, and how often you paint.
Plan for Airflow and Lighting
Place your drying station in a dust-controlled area with cross-ventilation. Use filtered air if possible, and avoid pointing fans directly at wet doors, which can push dust into the finish. Add bright LED work lights so you can inspect for runs, dry spots, and thin edges before the paint sets.
Setting Up Your Paint Drying Rack for Best Results
Once you have your equipment, setup is straightforward. Position the rack on a level floor and lock the casters. Set the hooks or brackets at a consistent height so doors do not collide. Label each door on the back or edge with painter’s tape so you can match it to the correct cabinet after curing.
- Prepare the space: Clean the floor, cover it if needed, and remove clutter.
- Hang doors: Leave at least a few inches between panels for airflow.
- Apply thin coats: Spray or brush evenly, working from edges to centers.
- Rotate after flash-off: Wait until the surface is tack-free before turning.
- Inspect under raking light: Catch sags, misses, and dust nibs early.
- Cure fully: Do not reinstall doors until the finish has hardened.
Maintenance and Safety Tips
Clean regularly: Paint buildup on hooks and brackets can transfer to the next project. Wipe them down with the appropriate solvent after each use.
Lubricate moving parts: A little silicone or dry lubricant keeps rotating arms and casters working smoothly.
Respect load limits: Overloading a rack can bend arms or tip the unit. If a door feels too heavy, use a second support point.
Use PPE: Wear a respirator, eye protection, and gloves when spraying. Keep solvents away from pilot lights, heaters, and other ignition sources.
Final Thoughts
A well-organized painting station pays for itself. The right hanger, rack, and brackets reduce rework, save floor space, and deliver a professional finish. Whether you are a cabinet maker or a weekend refinisher, invest in support gear that keeps wet doors safe and accessible. Your future self—and your flawless cabinet doors—will thank you.
Comments are closed